
Here’s some background on men’s neckties. They have evolved out of cravats and sashes that nobility wore in generations past, and in some cases, still wear for ceremonial occasions. You’ve probably noticed that some ties have diagonal stripes and others have insignia. The insignia and colors were representative of a nobleman’s family and social rank.
A striped tie is said to be either Bar Dexter or Bar Sinister. A Bar Dexter tie has stripes that fall from (the wearer’s) upper right to lower left, and Bar Sinister stripes run from upper left to lower right. This idea arose centuries ago as a result of a superstition that the devil sat on your left shoulder and encouraged you to sin, while an angel sat on your right shoulder and whispered encouragement to do good. Historically, the proper orientation was Bar Dexter, but these days, the significance is diluted to nil. The significance however of wearing a necktie and fresh, pressed shirt is an enduring part of our culture. This classic style messages respectability, reliability and a desire to be taken seriously.
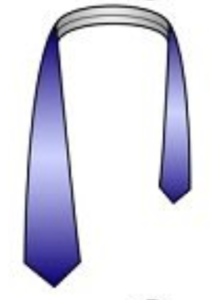
There are more than a dozen different ways to tie a tie, but not all of them look as elegant and sophisticated as I’d like you to look. If you’re going to make the effort to dress up, do it right. Only one way that I have learned yields a balanced knot. Like all good knots, it has a name! It’s called a Half-Windsor. You start by orienting the tie so that the wide end is on the right side. This seems to work best if you’re right-handed. Then tuck the tie under your collar, and next, button your collar button. Pull the wider end of the tie down much lower than the narrow end. How you start depends on the length of the tie and your neck size. The first time, pull it down a few inches below your belt. Don’t feel bad if you don’t get it right the first time. Just try again and again, adjusting it accordingly, until you’re happy with the way it looks. After a few tries, you’ll develop a feel for how tight it needs to be.
First, cross the long end over the short end

Then, wrap the wide end around and tuck the long end over the top and down behind


Next we’re going to wrap it in the opposite direction. Take the wide end, wrap across from your left to your right side

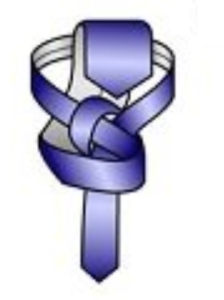
Then, take the wide end up from behind. While you’re doing this, stick your finger into this wide part that you’re wrapping around. You’ll bring the wide end over and into the gap that you’re creating with your finger.

Gently pull the wide end down inside the knot behind the horizontal bit. As you draw the wide end down and through the knot, gently draw up all of your slack by pulling down the narrow end of the tie, and snug the knot up to the collar button. Tighten the knot enough to keep it from loosening, while keeping the tie loose enough around your neck to be comfortable.

When the knot is properly tightened and snugged up to your collar, the wide end should come down to your belt buckle. Don’t worry about where the short end sits when it’s completed. If you don’t like the way it looks, do it again. And then do it again and again. After tying the knot several times, you’ll develop ‘muscle memory’ and it will become easy to replicate every time. Bon Vivant!
Would you like to share your thoughts?
Your email address will not be published. Required fields are marked *